ts-template
Deploying Your Application - A Guide For Everyone
Learn how to prepare your application to take it from your development environment to a simple deployment environment
Infrastructure
We use DigitalOcean to allow for straightforward management of infrastructure. This is especially helpful for teams with few engineers, so that they can focus on building better product.
You will need a credit card to sign up for DigitalOcean.
DigitalOcean Set-up
On initial login to DigitalOcean, the user will be presented with the following screen:

Create a new database cluster, selecting the Singapore datacentre and PostgreSQL as the engine:

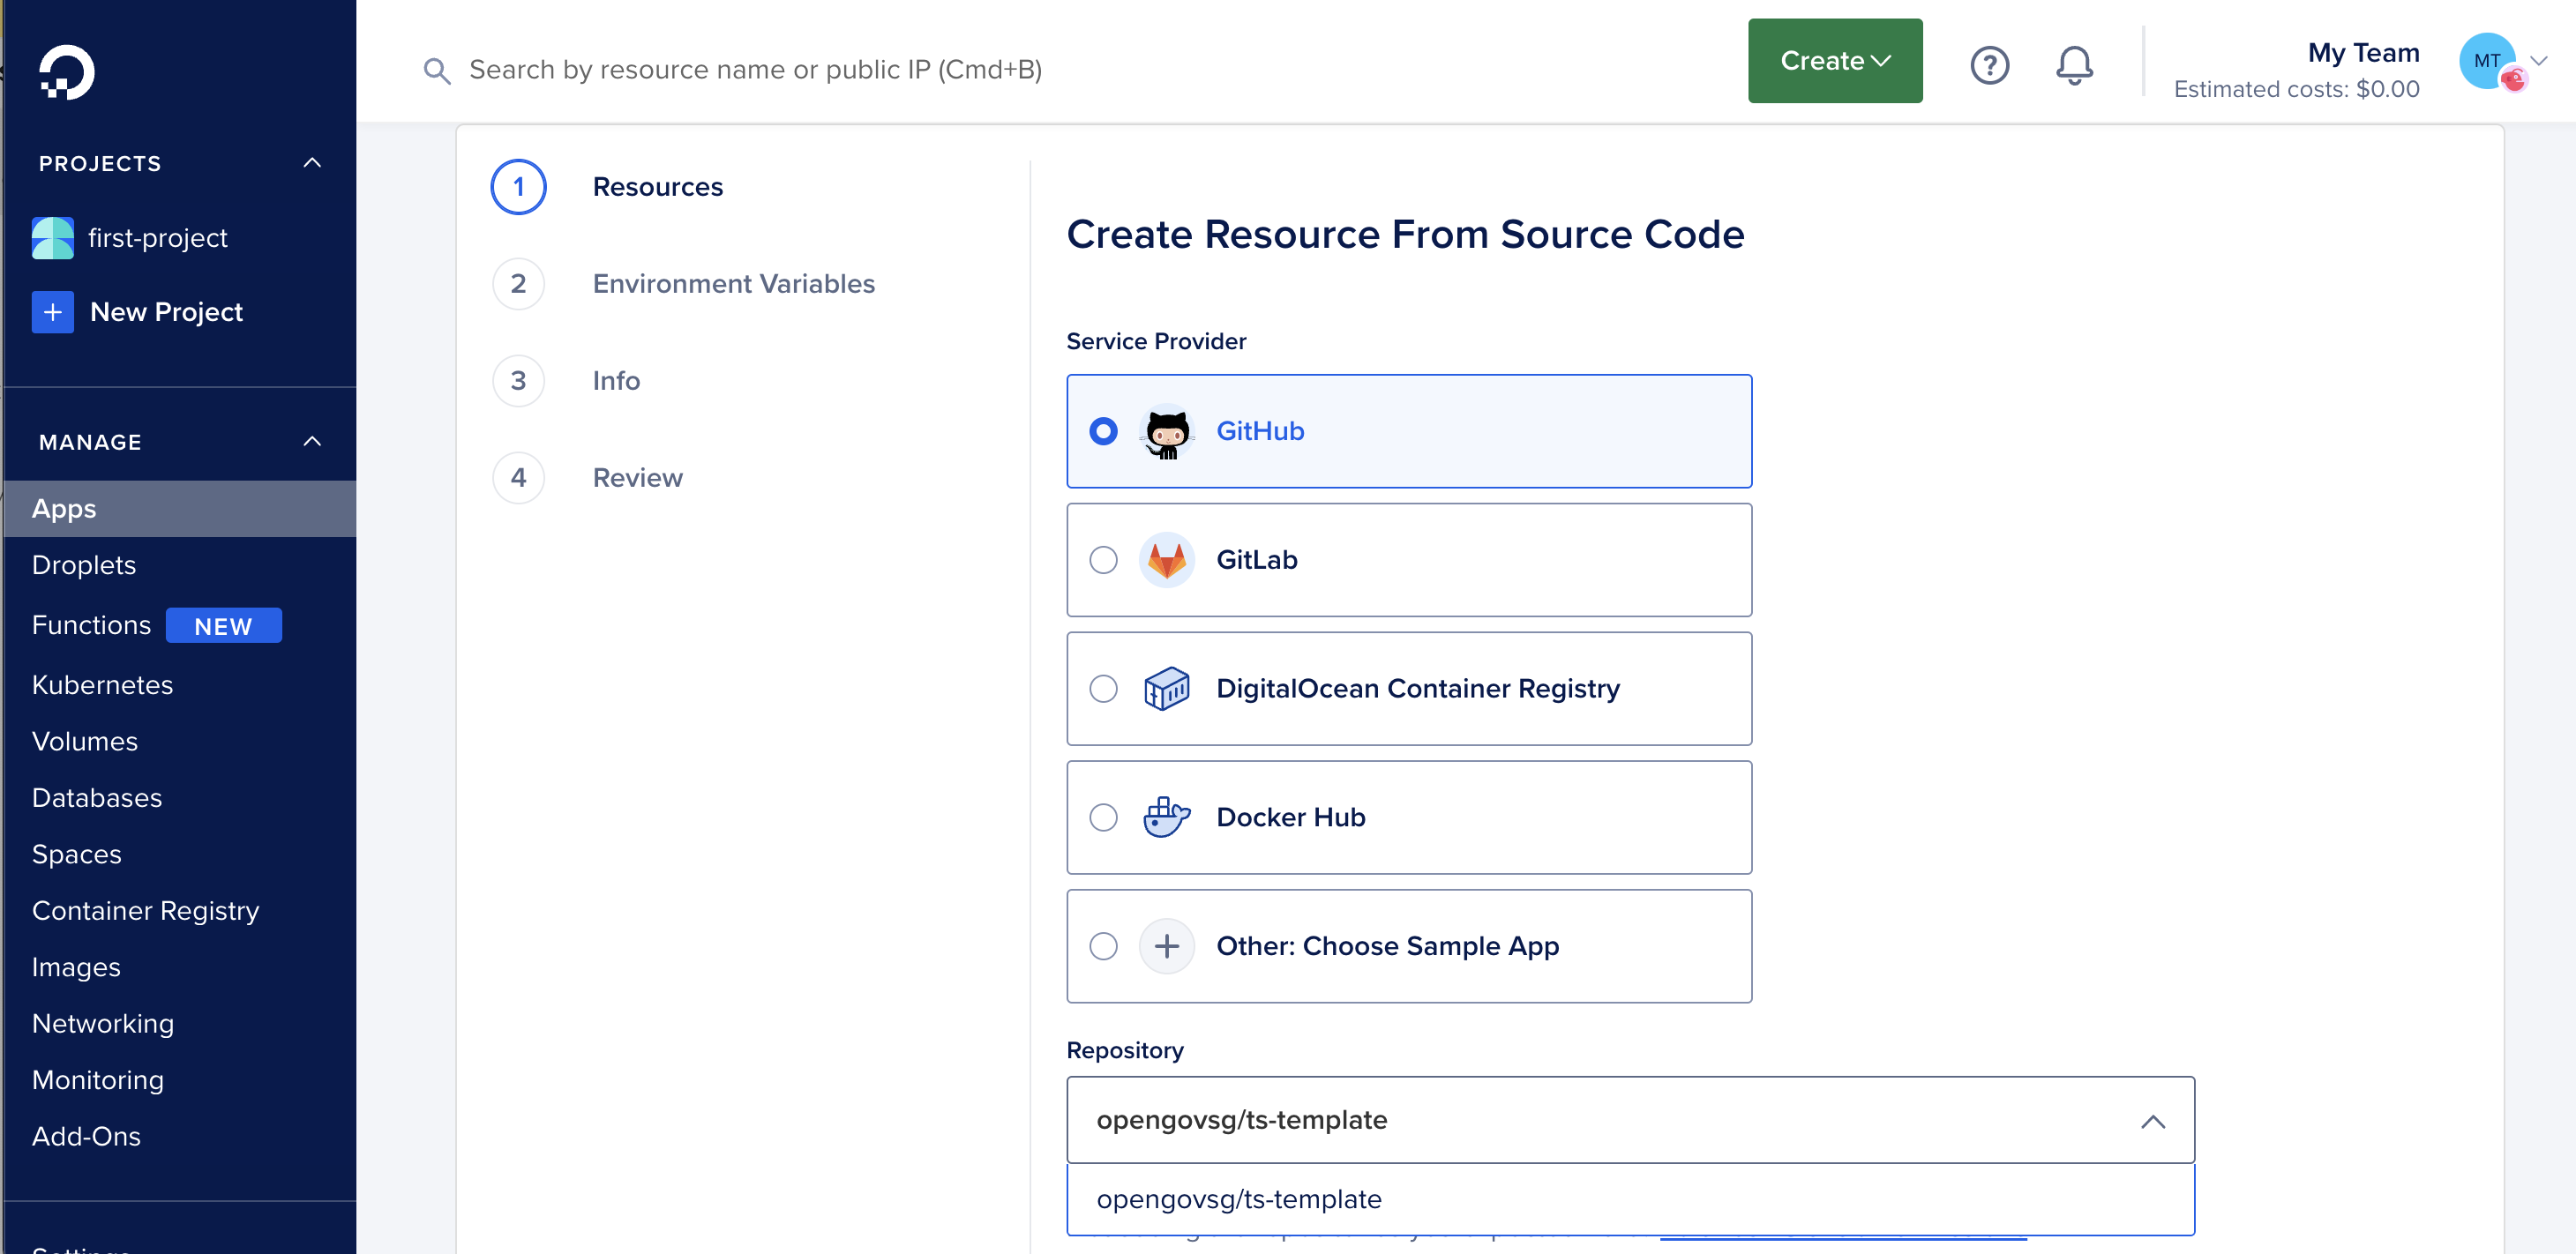
In a new tab, create a new App on DigitalOcean by clicking Create App, followed by Manage Access. Ensure that the DigitalOcean GitHub App (integration) is installed on both your personal GitHub account as well as the GitHub organisation containing the repo to deploy1.

Click Next. Ensure Resources consist of a Web Service read from the Dockerfile, with 2GB RAM. Add a database as a resource.

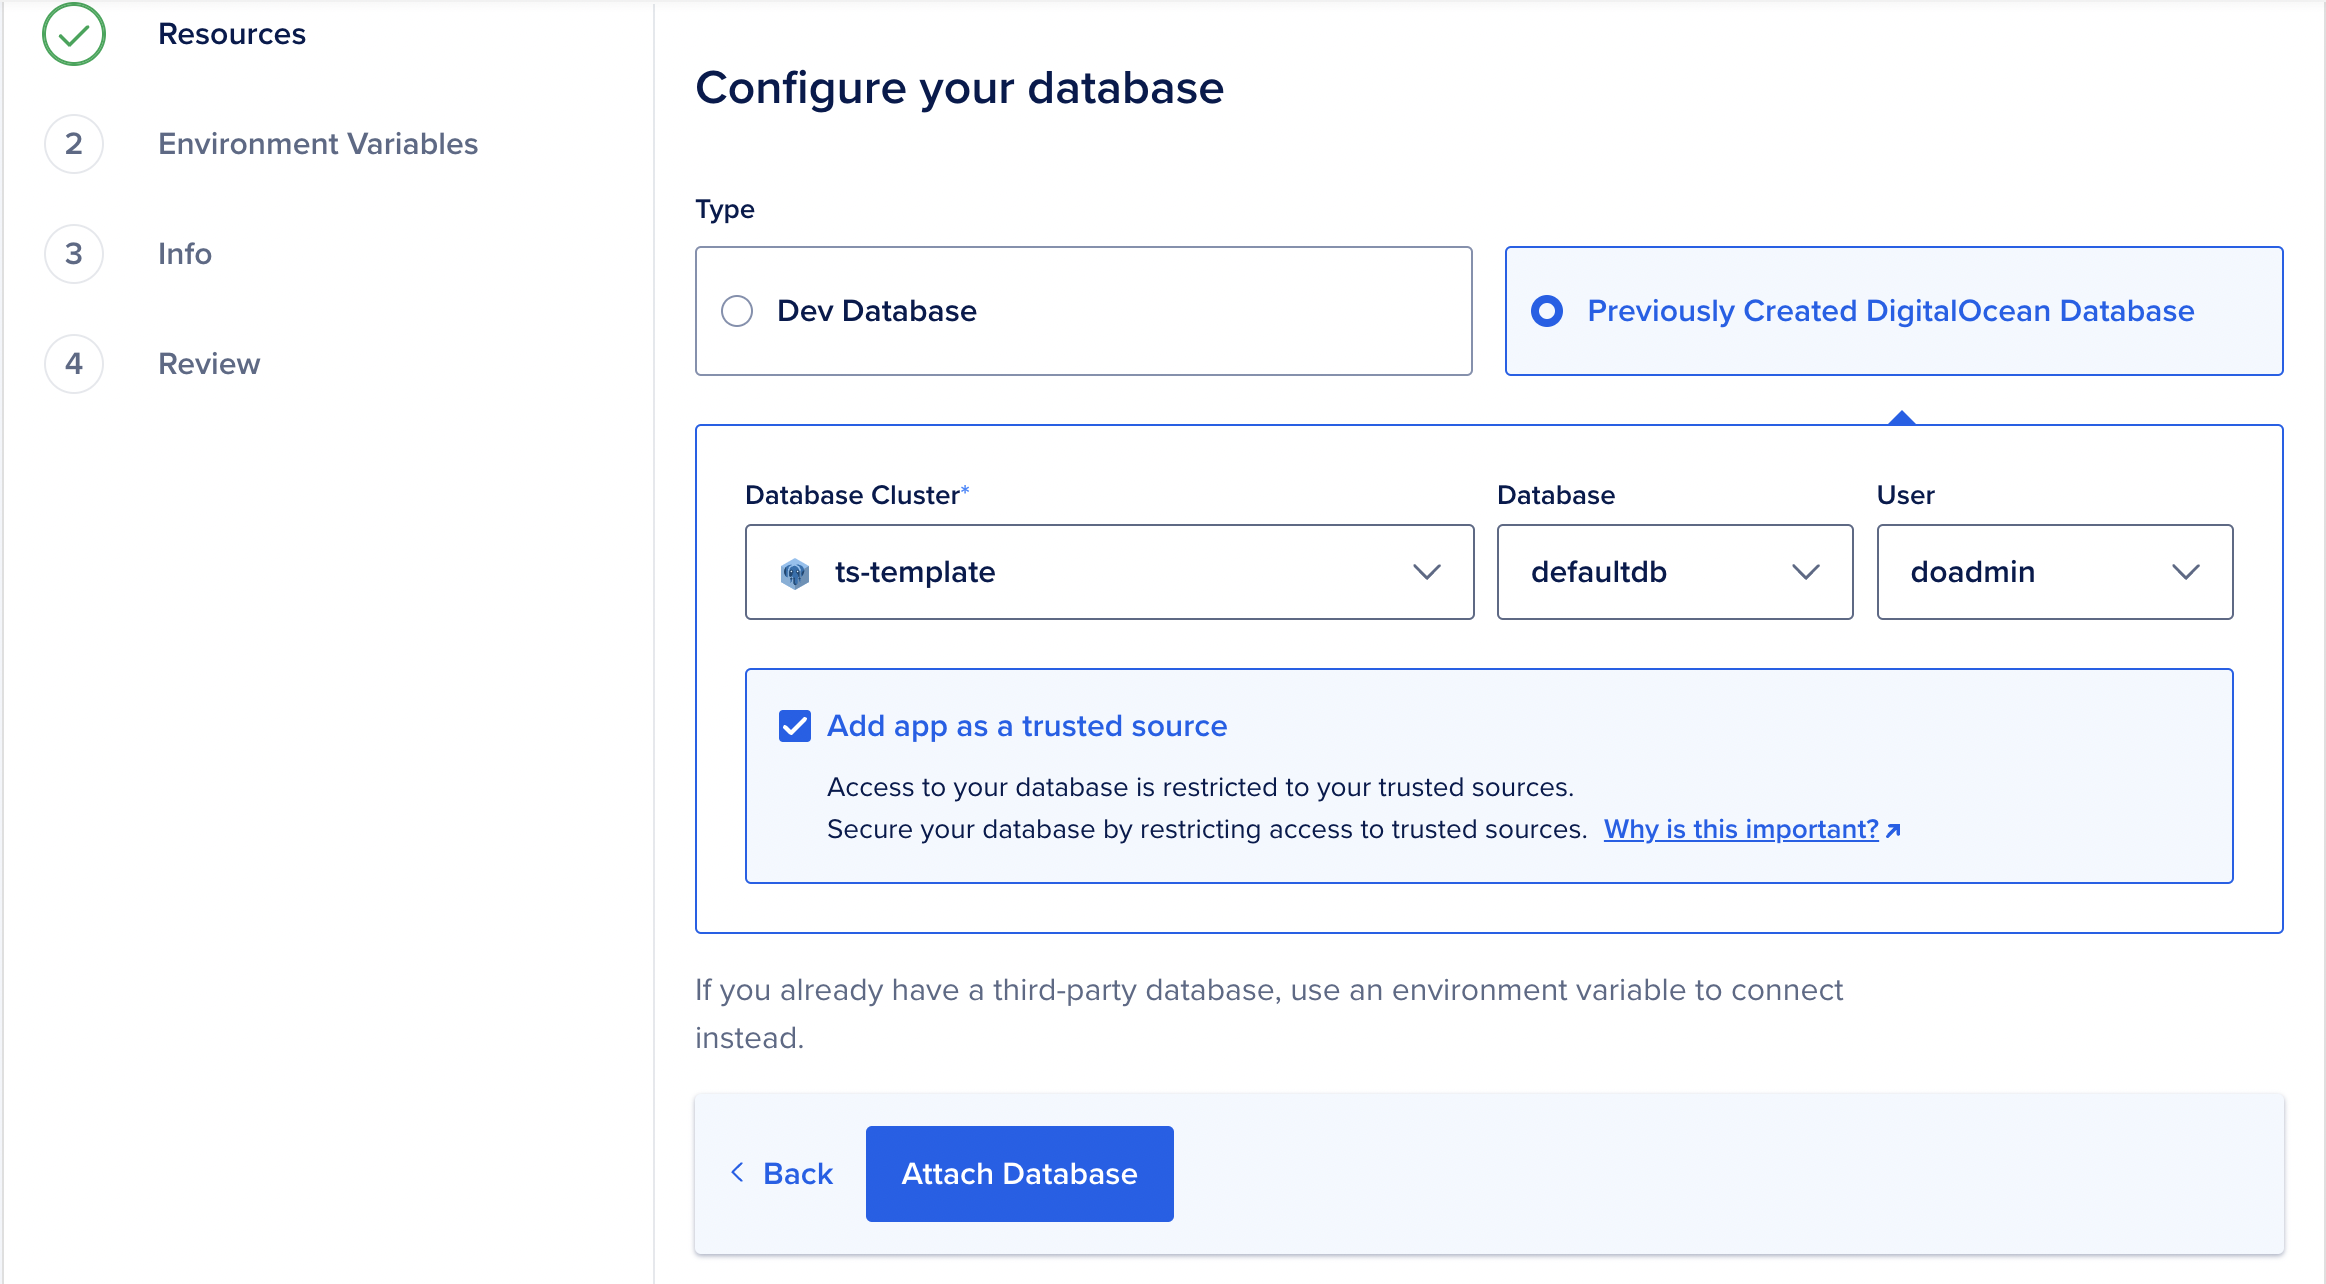
Under Configure Your Database, add your Previously Created DigitalOcean Database.

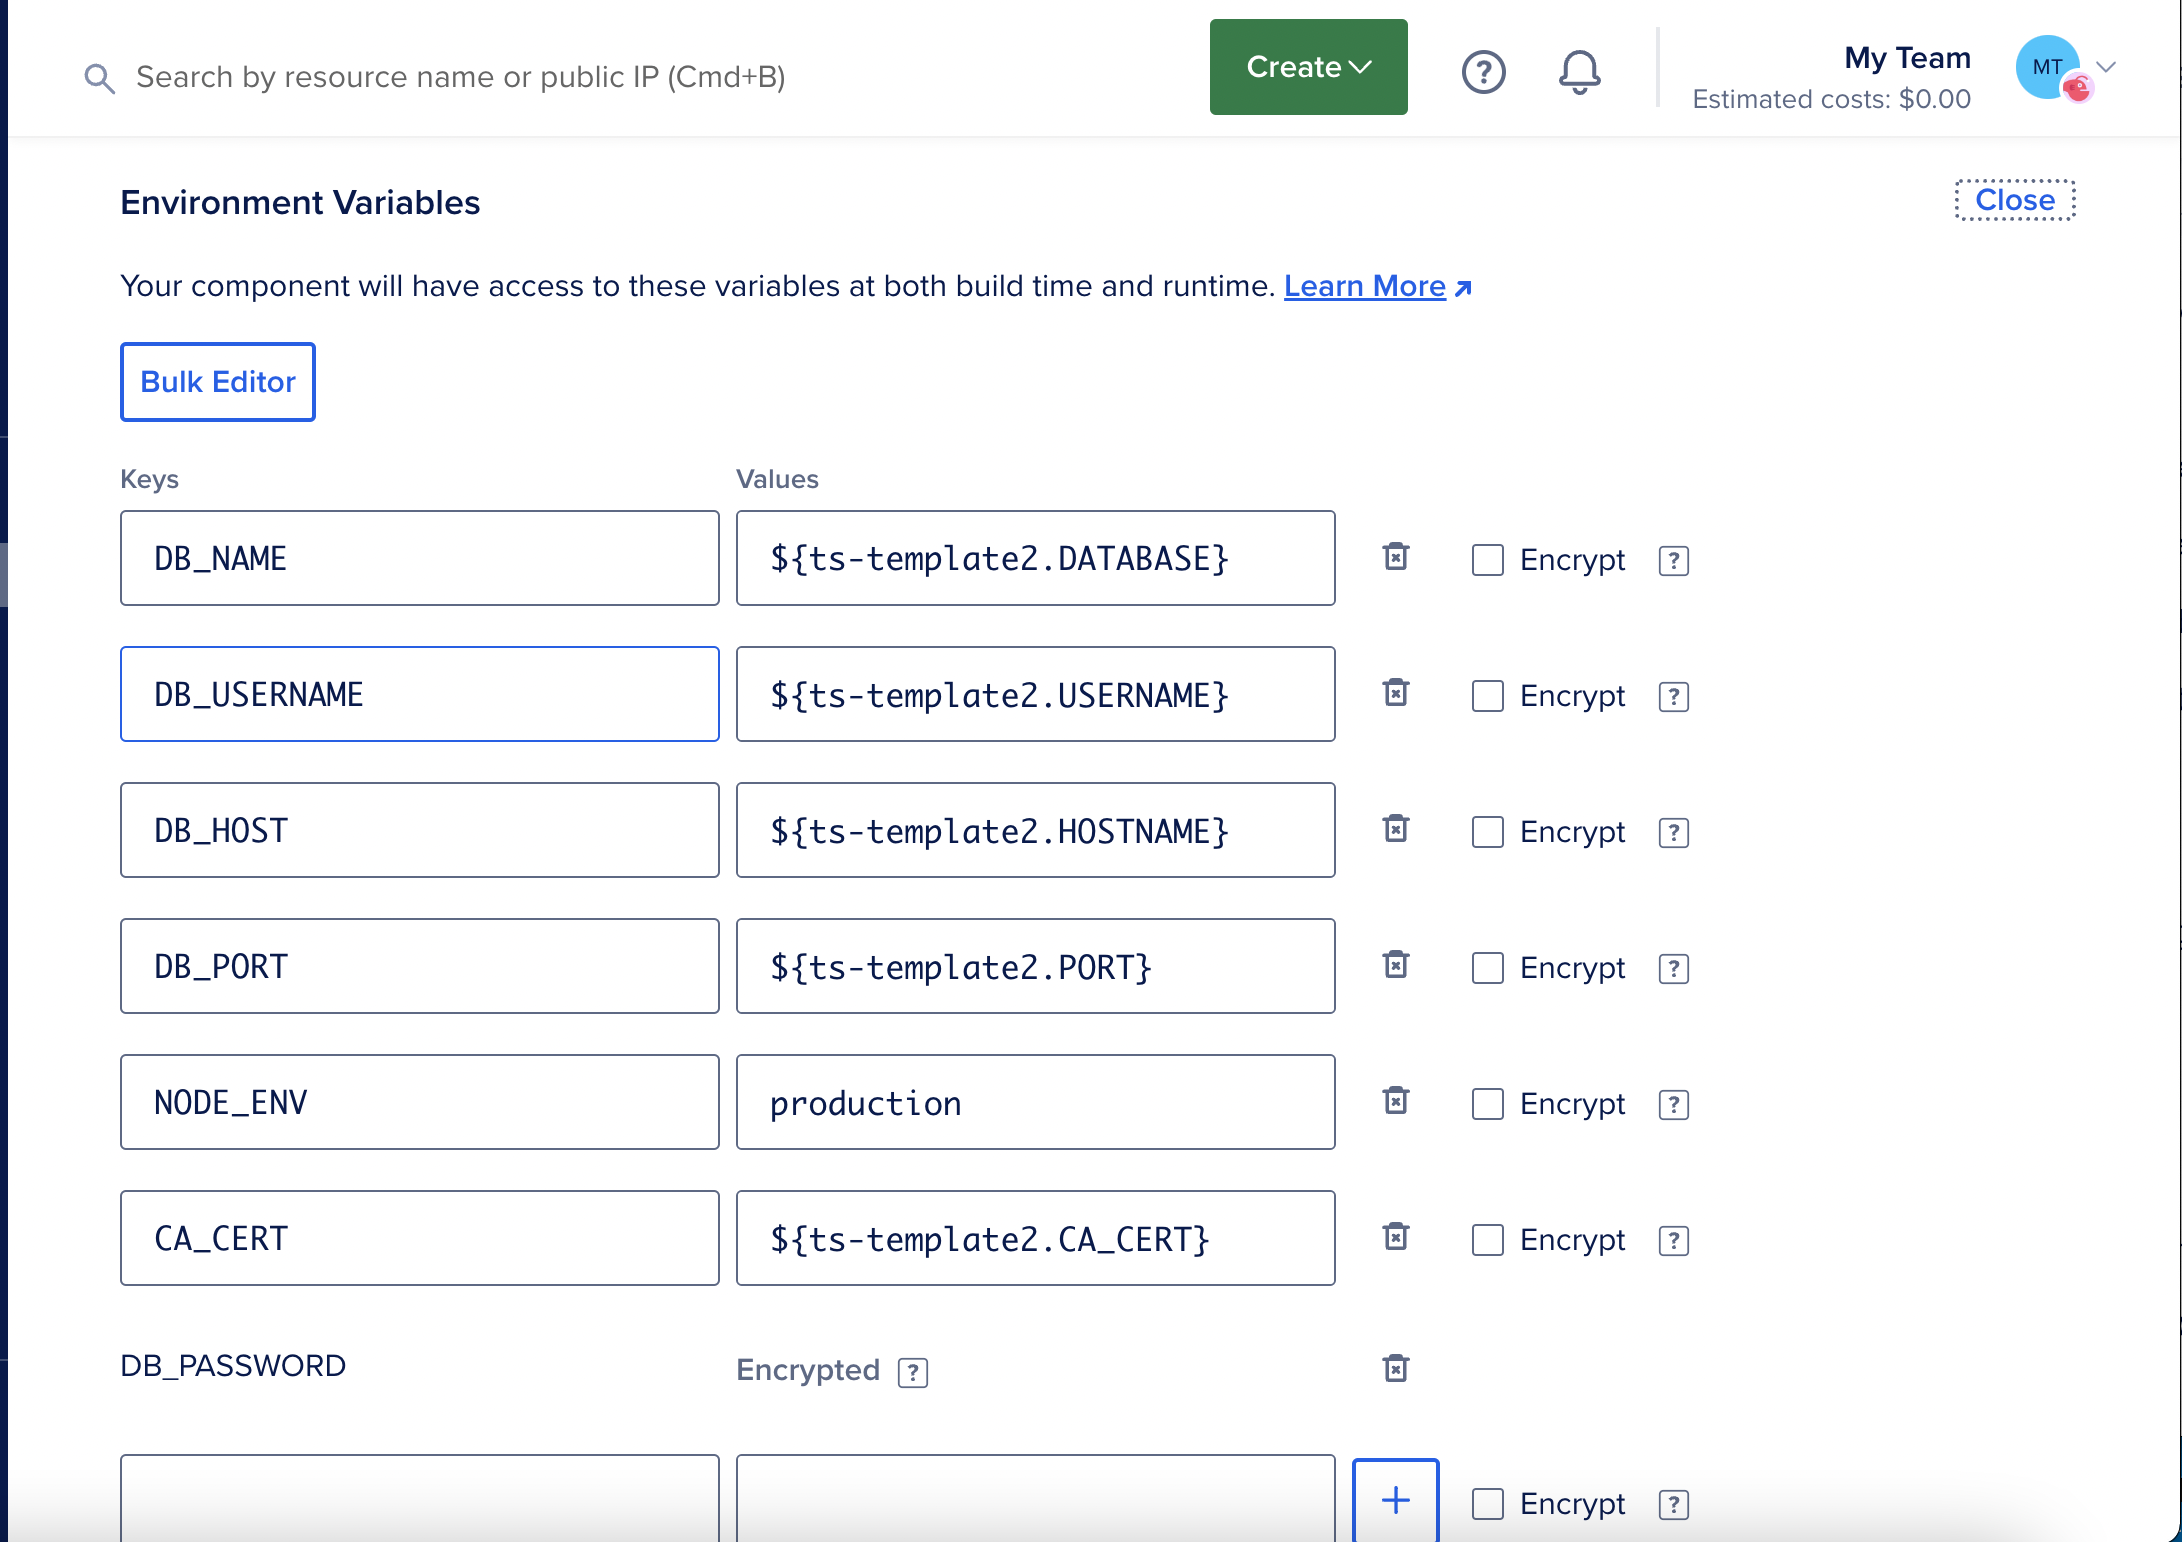
Edit the application’s environment variables.
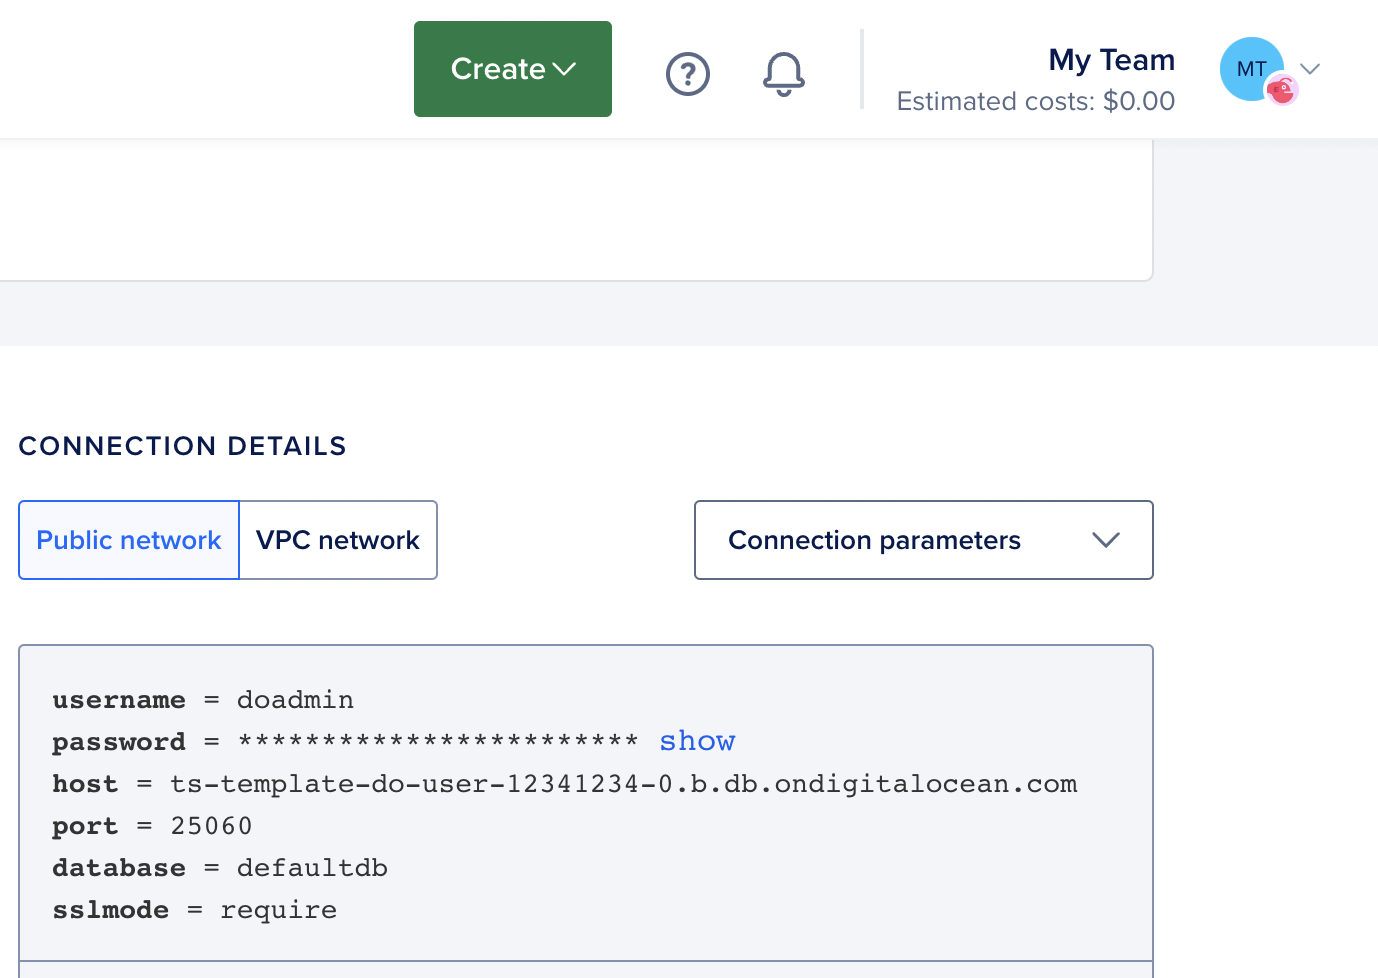
Go back to the database tab, and copy each connection parameter to the
corresponding environment variable as shown in the screenshots below.
Also add NODE_ENV, and set that to production.
(If you wish to use email OTPs for your application, sign up for an email service like SendGrid, then input the mail connection parameters as the relevant environment variables documented here.


Click ahead to Review, then Create Resources
References
-
https://www.digitalocean.com/community/questions/how-to-properly-link-github-repositories-in-app-platform ↩